Unity agrega chat multijugador a PUN 2 Rooms
En este tutorial, mostraré cómo agregar una sala de chat en PUN 2 usando RPC (llamadas a procedimiento remoto).
¡Vamos a empezar!
Parte 1: Configuración de PUN 2 y ejemplo multijugador
Ya tenemos un tutorial sobre cómo configurar un ejemplo multijugador con PUN 2, consulta el siguiente enlace:
Crea un juego multijugador en Unity 3D usando PUN 2
Vuelve una vez que hayas terminado de configurar un proyecto multijugador para que podamos continuar.
Alternativamente, puede descargar el proyecto fuente directamente.
Parte 2: Agregar chat multijugador
- Crea un nuevo script, llámalo PUN2_Chat y luego pega el siguiente código dentro de él:
PUN2_Chat.cs
using System.Collections;
using System.Collections.Generic;
using UnityEngine;
using Photon.Pun;
using Photon.Realtime;

public class PUN2_Chat : MonoBehaviourPun
{
    bool isChatting = false;
    string chatInput = "";

    [System.Serializable]
    public class ChatMessage
    {
        public string sender = "";
        public string message = "";
        public float timer = 0;
    }

    List<ChatMessage> chatMessages = new List<ChatMessage>();

    // Start is called before the first frame update
    void Start()
    {
        //Initialize Photon View
        if(gameObject.GetComponent<PhotonView>() == null)
        {
            PhotonView photonView = gameObject.AddComponent<PhotonView>();
            photonView.ViewID = 1;
        }
        else
        {
            photonView.ViewID = 1;
        }
    }

    // Update is called once per frame
    void Update()
    {
        if (Input.GetKeyUp(KeyCode.T) && !isChatting)
        {
            isChatting = true;
            chatInput = "";
        }

        //Hide messages after timer is expired
        for (int i = 0; i < chatMessages.Count; i++)
        {
            if (chatMessages[i].timer > 0)
            {
                chatMessages[i].timer -= Time.deltaTime;
            }
        }
    }

    void OnGUI()
    {
        if (!isChatting)
        {
            GUI.Label(new Rect(5, Screen.height - 25, 200, 25), "Press 'T' to chat");
        }
        else
        {
            if (Event.current.type == EventType.KeyDown && Event.current.keyCode == KeyCode.Return)
            {
                isChatting = false;
                if(chatInput.Replace(" ", "") != "")
                {
                    //Send message
                    photonView.RPC("SendChat", RpcTarget.All, PhotonNetwork.LocalPlayer, chatInput);
                }
                chatInput = "";
            }

            GUI.SetNextControlName("ChatField");
            GUI.Label(new Rect(5, Screen.height - 25, 200, 25), "Say:");
            GUIStyle inputStyle = GUI.skin.GetStyle("box");
            inputStyle.alignment = TextAnchor.MiddleLeft;
            chatInput = GUI.TextField(new Rect(10 + 25, Screen.height - 27, 400, 22), chatInput, 60, inputStyle);

            GUI.FocusControl("ChatField");
        }

        //Show messages
        for(int i = 0; i < chatMessages.Count; i++)
        {
            if(chatMessages[i].timer > 0 || isChatting)
            {
                GUI.Label(new Rect(5, Screen.height - 50 - 25 * i, 500, 25), chatMessages[i].sender + ": " + chatMessages[i].message);
            }
        }
    }

    [PunRPC]
    void SendChat(Player sender, string message)
    {
        ChatMessage m = new ChatMessage();
        m.sender = sender.NickName;
        m.message = message;
        m.timer = 15.0f;

        chatMessages.Insert(0, m);
        if(chatMessages.Count > 8)
        {
            chatMessages.RemoveAt(chatMessages.Count - 1);
        }
    }
}
Si seguiste nuestro tutorial de PUN 2 ahora tendrías 2 escenas "GameLobby" y "GameLevel"
- Abra la escena "GameLevel", luego adjunte PUN2_Chat al objeto _RoomController y luego guarde la escena.
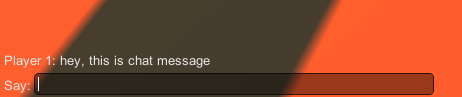
- Abra la escena "GameLobby" y luego cree una nueva sala. Ahora debería poder chatear presionando "T"