Guía para principiantes de Photon Network (clásico)
Photon Network es un servicio para Unity que permite a los desarrolladores crear juegos multijugador en tiempo real.
Proporciona una API poderosa y fácil de usar que la hace perfecta incluso para desarrolladores novatos.
En esta publicación, ejecutaremos la descarga de los archivos necesarios, la configuración de Photon AppID y la programación de un ejemplo simple de varios jugadores.
Parte 1: Configuración de la red de fotones
El primer paso es descargar el paquete Photon Network desde Asset Store. Contiene todos los scripts y archivos necesarios para la integración multijugador.
- Abra su proyecto Unity y luego vaya a Asset Store: (Ventana -> General -> AssetStore ) o presione Ctrl+9
- Busque "Photon Unity Networking Classic - Free" y luego haga clic en el primer resultado o haga clic aquí
- Importe el paquete Photon después de que finalice la descarga


- Después de importar el paquete, debe crear una ID de la aplicación Photon, esto se hace en su sitio web: https://www.photonengine.com/
- Cree una nueva cuenta (o inicie sesión en su cuenta existente)
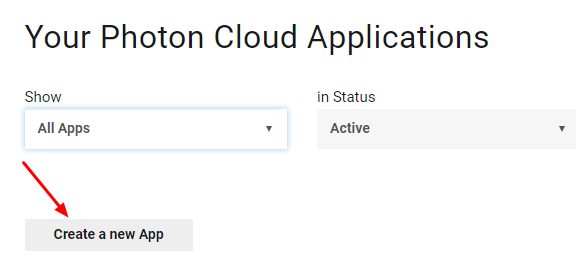
- Vaya a la página de Aplicaciones haciendo clic en el ícono de perfil y luego en "Your Applications" o siga este enlace: https://dashboard.photonengine.com/en-US/PublicCloud
- En la página Aplicaciones, haga clic en "Create new app"
- En la página de creación, para Tipo de fotón seleccione "Photon Realtime" y para Nombre, escriba cualquier nombre y luego haga clic "Create"
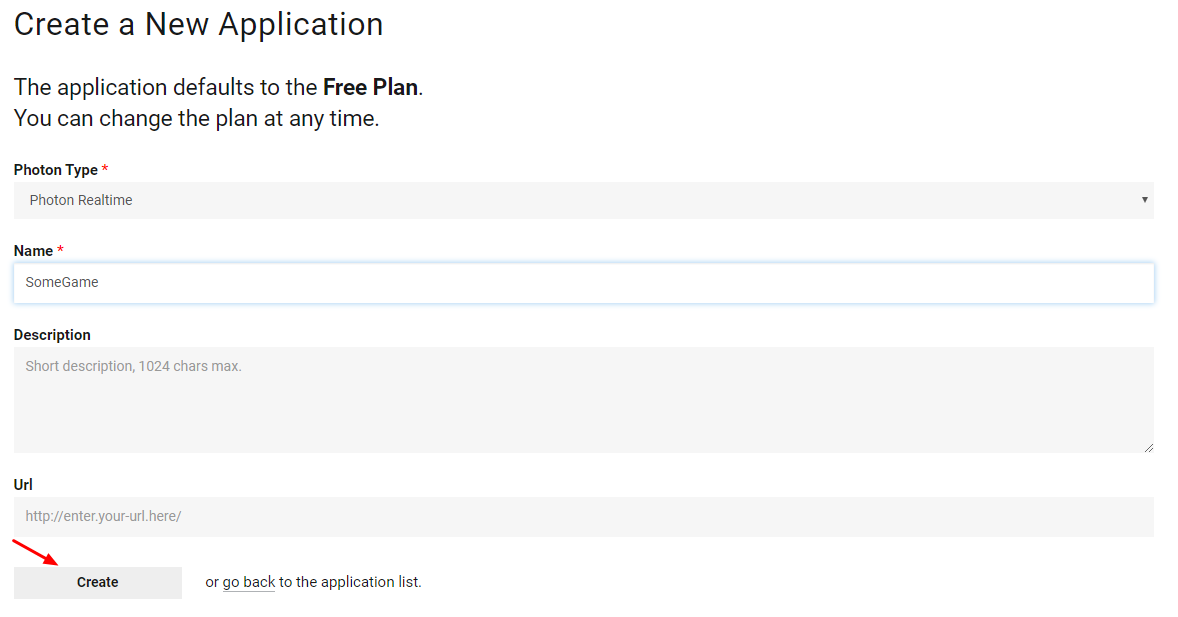
Como puede ver, la aplicación tiene como valor predeterminado el plan gratuito. Puede leer más sobre los planes de precios aquí
- Una vez creada la aplicación, copie el ID de la aplicación que se encuentra debajo del nombre de la aplicación.

- Regrese a su proyecto Unity y luego vaya a Ventana -> Photon Unity Networking -> PUN Wizard
- En PUN Wizard, haga clic en "Setup Project", pegue su ID de aplicación y luego haga clic en "Setup Project"
- La red de fotones ya está lista
Parte 2: Crear un juego multijugador
Ahora pasemos a la parte en la que realmente creamos un juego multijugador.
La forma en que se maneja el modo multijugador en Photon es:
- Primero, nos conectamos a Photon Region (por ejemplo, EE. UU. Este, Europa, Asia, etc.) que también se conoce como Lobby.
- Una vez en el Lobby, solicitamos todas las Salas que se crean en la región, luego podemos unirnos a una de las Salas o crear nuestra propia Sala.
- Después de unirnos a la sala, solicitamos una lista de los jugadores conectados a la sala e instanciamos sus instancias de Player, que luego se sincronizan con sus instancias locales a través de PhotonView.
- Cuando alguien abandona la sala, su instancia se destruye y se elimina de la lista de jugadores.
1. Configuración de un vestíbulo
Comencemos por crear un MainMenu que contendrá una lógica de Lobby (Exploración de salas existentes, creación de nuevas salas, etc.).
- Crea una nueva escena y llámala "MainMenu"
- Cree un nuevo script C# y llámelo GameLobby
- En la escena MainMenu crea un nuevo GameObject. Llámelo "_GameLobby" y adjúntele el script de GameLobby
Ahora abra el script de GameLobby.
Primero, vamos a crear todas las variables necesarias:
    //Our player name
    string playerName = "Player 1";
    //This client's version number. Users are separated from each other by gameversion (which allows you to make breaking changes).
    string gameVersion = "0.9";
    //The list of created rooms
    RoomInfo[] createdRooms = new RoomInfo[0];
    //Use this name when creating a Room
    string roomName = "Room 1";
    Vector2 roomListScroll = Vector2.zero;
    bool joiningRoom = false;
Lo siguiente que debemos hacer es habilitar Auto-Join Lobby y Lobby Stats, esto nos permitirá recibir la lista de salas. Esto se hace en el vacío Start().
Además, habilitamos automaticSyncScene para que la escena se sincronice automáticamente una vez que nos unamos a la sala.
Y, por último, llamamos a PhotonNetwork.ConnectUsingSettings para conectarse.
    // Use this for initialization
    void Start()
    {
        //Automatically join Lobby after we connect to Photon Region
        PhotonNetwork.PhotonServerSettings.JoinLobby = true;
        //Enable Lobby Stats to receive the list of Created rooms
        PhotonNetwork.PhotonServerSettings.EnableLobbyStatistics = true;
        //This makes sure we can use PhotonNetwork.LoadLevel() on the master client and all clients in the same room sync their level automatically
        PhotonNetwork.automaticallySyncScene = true;

        if (!PhotonNetwork.connected)
        {
            // Connect to the photon master-server. We use the settings saved in PhotonServerSettings (a .asset file in this project)
            PhotonNetwork.ConnectUsingSettings(gameVersion);
        }
    }
Para saber si una conexión a Photon Cloud fue exitosa, tenemos que implementar estas 2 devoluciones de llamada: OnReceivedRoomListUpdate() y OnFailedToConnectToPhoton(objeto parámetros).
void OnFailedToConnectToPhoton(object parameters)
{
Debug.Log("OnFailedToConnectToPhoton. StatusCode: " + parameters + " ServerAddress: " + PhotonNetwork.ServerAddress);
//Try to connect again
PhotonNetwork.ConnectUsingSettings(gameVersion);
}
void OnReceivedRoomListUpdate()
{
Debug.Log("We have received the Room list");
//After this callback, PhotonNetwork.GetRoomList() becomes available
createdRooms = PhotonNetwork.GetRoomList();
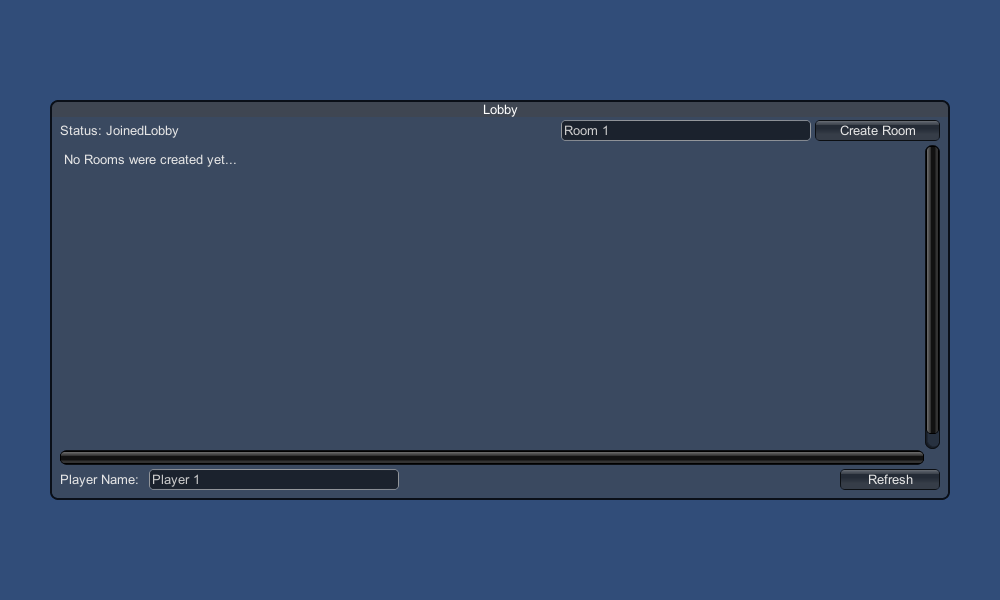
}La siguiente es la parte de la interfaz de usuario, donde se realizan la navegación y la creación de salas:
Y, por último, implementamos otras 4 devoluciones de llamada: OnPhotonCreateRoomFailed(), OnPhotonJoinRoomFailed(object[] cause), OnCreatedRoom() y OnJoinedRoom().
Estas devoluciones de llamada se utilizan para determinar si nos unimos o creamos la sala o si hubo algún problema durante la conexión.
    void OnPhotonCreateRoomFailed()
    {
        Debug.Log("OnPhotonCreateRoomFailed got called. This can happen if the room exists (even if not visible). Try another room name.");
        joiningRoom = false;
    }

    void OnPhotonJoinRoomFailed(object[] cause)
    {
        Debug.Log("OnPhotonJoinRoomFailed got called. This can happen if the room is not existing or full or closed.");
        joiningRoom = false;
    }

    void OnCreatedRoom()
    {
        Debug.Log("OnCreatedRoom");
        //Set our player name
        PhotonNetwork.playerName = playerName;
        //Load the Scene called GameLevel (Make sure it's added to build settings)
        PhotonNetwork.LoadLevel("GameLevel");
    }

    void OnJoinedRoom()
    {
        Debug.Log("OnJoinedRoom");
    }
Y aquí está el script final GameLobby.cs:
using System.Collections;
using System.Collections.Generic;
using UnityEngine;

public class GameLobby : MonoBehaviour
{
    //Our player name
    string playerName = "Player 1";
    //This client's version number. Users are separated from each other by gameversion (which allows you to make breaking changes).
    string gameVersion = "0.9";
    //The list of created rooms
    RoomInfo[] createdRooms = new RoomInfo[0];
    //Use this name when creating a Room
    string roomName = "Room 1";
    Vector2 roomListScroll = Vector2.zero;
    bool joiningRoom = false;

    // Use this for initialization
    void Start()
    {
        //Automatically join Lobby after we connect to Photon Region
        PhotonNetwork.PhotonServerSettings.JoinLobby = true;
        //Enable Lobby Stats to receive the list of Created rooms
        PhotonNetwork.PhotonServerSettings.EnableLobbyStatistics = true;
        //This makes sure we can use PhotonNetwork.LoadLevel() on the master client and all clients in the same room sync their level automatically
        PhotonNetwork.automaticallySyncScene = true;

        if (!PhotonNetwork.connected)
        {
            // Connect to the photon master-server. We use the settings saved in PhotonServerSettings (a .asset file in this project)
            PhotonNetwork.ConnectUsingSettings(gameVersion);
        }
    }

    void OnFailedToConnectToPhoton(object parameters)
    {
        Debug.Log("OnFailedToConnectToPhoton. StatusCode: " + parameters + " ServerAddress: " + PhotonNetwork.ServerAddress);
        //Try to connect again
        PhotonNetwork.ConnectUsingSettings(gameVersion);
    }

    void OnReceivedRoomListUpdate()
    {
        Debug.Log("We have received the Room list");
        //After this callback, PhotonNetwork.GetRoomList() becomes available
        createdRooms = PhotonNetwork.GetRoomList();
    }

    void OnGUI()
    {
        GUI.Window(0, new Rect(Screen.width/2 - 450, Screen.height/2 - 200, 900, 400), LobbyWindow, "Lobby");
    }

    void LobbyWindow(int index)
    {
        //Connection Status and Room creation Button
        GUILayout.BeginHorizontal();

            GUILayout.Label("Status: " + PhotonNetwork.connectionStateDetailed);

            if(joiningRoom || !PhotonNetwork.connected)
            {
                GUI.enabled = false;
            }

            GUILayout.FlexibleSpace();

            //Room name text field
            roomName = GUILayout.TextField(roomName, GUILayout.Width(250));

            if (GUILayout.Button("Create Room", GUILayout.Width(125)))
            {
                if (roomName != "")
                {
                    joiningRoom = true;

                    RoomOptions roomOptions = new RoomOptions();
                    roomOptions.IsOpen = true;
                    roomOptions.IsVisible = true;
                    roomOptions.MaxPlayers = (byte)10; //Set any number

                    PhotonNetwork.JoinOrCreateRoom(roomName, roomOptions, TypedLobby.Default);
                }
            }

        GUILayout.EndHorizontal();

        //Scroll through available rooms
        roomListScroll = GUILayout.BeginScrollView(roomListScroll, true, true);

            if(createdRooms.Length == 0)
            {
                GUILayout.Label("No Rooms were created yet...");
            }
            else
            {
                for(int i = 0; i < createdRooms.Length; i++)
                {
                    GUILayout.BeginHorizontal("box");
                    GUILayout.Label(createdRooms[i].Name, GUILayout.Width(400));
                    GUILayout.Label(createdRooms[i].PlayerCount + "/" + createdRooms[i].MaxPlayers);

                    GUILayout.FlexibleSpace();

                    if (GUILayout.Button("Join Room"))
                    {
                        joiningRoom = true;

                        //Set our Player name
                        PhotonNetwork.playerName = playerName;

                        //Join the Room
                        PhotonNetwork.JoinRoom(createdRooms[i].Name);
                    }
                    GUILayout.EndHorizontal();
                }
            }

        GUILayout.EndScrollView();

        //Set player name and Refresh Room button
        GUILayout.BeginHorizontal();

            GUILayout.Label("Player Name: ", GUILayout.Width(85));
            //Player name text field
            playerName = GUILayout.TextField(playerName, GUILayout.Width(250));

            GUILayout.FlexibleSpace();

            GUI.enabled = PhotonNetwork.connectionState != ConnectionState.Connecting && !joiningRoom;
            if (GUILayout.Button("Refresh", GUILayout.Width(100)))
            {
                if (PhotonNetwork.connected)
                {
                    //We are already connected, simply update the Room list
                    createdRooms = PhotonNetwork.GetRoomList();
                }
                else
                {
                    //We are not connected, estabilish a new connection
                    PhotonNetwork.ConnectUsingSettings(gameVersion);
                }
            }

        GUILayout.EndHorizontal();

        if (joiningRoom)
        {
            GUI.enabled = true;
            GUI.Label(new Rect(900/2 - 50, 400/2 - 10, 100, 20), "Connecting...");
        }
    }

    void OnPhotonCreateRoomFailed()
    {
        Debug.Log("OnPhotonCreateRoomFailed got called. This can happen if the room exists (even if not visible). Try another room name.");
        joiningRoom = false;
    }

    void OnPhotonJoinRoomFailed(object[] cause)
    {
        Debug.Log("OnPhotonJoinRoomFailed got called. This can happen if the room is not existing or full or closed.");
        joiningRoom = false;
    }

    void OnCreatedRoom()
    {
        Debug.Log("OnCreatedRoom");
        //Set our player name
        PhotonNetwork.playerName = playerName;
        //Load the Scene called GameLevel (Make sure it's added to build settings)
        PhotonNetwork.LoadLevel("GameLevel");
    }

    void OnJoinedRoom()
    {
        Debug.Log("OnJoinedRoom");
    }
}
2. Creación de un reproductor prefabricado
En los juegos multijugador, la instancia del jugador tiene 2 lados: local y remoto.
Una instancia local es controlada localmente (por nosotros).
La instancia remota, por otro lado, es una representación local de lo que está haciendo el otro jugador. No debería verse afectado por nuestra entrada.
Para determinar si la instancia es local o remota, usamos un componente PhotonView.
PhotonView actúa como un mensajero que recibe y envía los valores que deben sincronizarse, por ejemplo, la posición y la rotación.
Entonces, comencemos creando la instancia del reproductor (si ya tiene lista la instancia del reproductor, puede omitir este paso).
En mi caso, la instancia de Player será un cubo simple que se mueve con las teclas W y S y se gira con las teclas A y D.

Y aquí hay un script de controlador simple:
PlayerController.cs
using UnityEngine;

public class PlayerController : MonoBehaviour
{
    // Update is called once per frame
    void Update()
    {
        //Move Front/Back
        if (Input.GetKey(KeyCode.W))
        {
            transform.Translate(transform.forward * Time.deltaTime * 2.45f, Space.World);
        }
        else if (Input.GetKey(KeyCode.S))
        {
            transform.Translate(-transform.forward * Time.deltaTime * 2.45f, Space.World);
        }

        //Rotate Left/Right
        if (Input.GetKey(KeyCode.A))
        {
            transform.Rotate(new Vector3(0, -14, 0) * Time.deltaTime * 4.5f, Space.Self);
        }
        else if (Input.GetKey(KeyCode.D))
        {
            transform.Rotate(new Vector3(0, 14, 0) * Time.deltaTime * 4.5f, Space.Self);
        }
    }
}
El siguiente paso es agregar un componente PhotonView.
- Agregue un componente PhotonView a la instancia del reproductor
- Cree un nuevo script C#, llámelo PlayerNetworkSync y ábralo (este script se usará para comunicarse a través de PhotonView)
Lo primero que debemos hacer es reemplazar MonoBehaviour con Photon.MonoBehaviour. Este paso es necesario para poder usar la variable photonView almacenada en caché en lugar de usar GetComponent<PhotonView>().
public class PlayerNetworkSync : Photon.MonoBehaviourDespués de eso, podemos pasar a crear todas las variables necesarias:
    //List of the scripts that should only be active for the local player (ex. PlayerController, MouseLook etc.)
    public MonoBehaviour[] localScripts;
    //List of the GameObjects that should only be active for the local player (ex. Camera, AudioListener etc.)
    public GameObject[] localObjects;
    //Values that will be synced over network
    Vector3 latestPos;
    Quaternion latestRot;
Luego, en el vacío Start() verificamos si el reproductor es Local o Remoto usando photonView.isMine:
    // Use this for initialization
    void Start()
    {
        if (photonView.isMine)
        {
            //Player is local
        }
        else
        {
            //Player is Remote
            for(int i = 0; i < localScripts.Length; i++)
            {
                localScripts[i].enabled = false;
            }
            for (int i = 0; i < localObjects.Length; i++)
            {
                localObjects[i].SetActive(false);
            }
        }
    }
La sincronización real se realiza a través de la devolución de llamada de PhotonView: OnPhotonSerializeView(PhotonStream stream, PhotonMessageInfo info):
    void OnPhotonSerializeView(PhotonStream stream, PhotonMessageInfo info)
    {
        if (stream.isWriting)
        {
            //We own this player: send the others our data
            stream.SendNext(transform.position);
            stream.SendNext(transform.rotation);
        }
        else
        {
            //Network player, receive data
            latestPos = (Vector3)stream.ReceiveNext();
            latestRot = (Quaternion)stream.ReceiveNext();
        }
    }
En este caso, solo enviamos la posición y la rotación del jugador, pero puede usar el ejemplo anterior para enviar cualquier valor que se necesite sincronizar a través de la red, a una frecuencia alta.
Los valores recibidos se aplican luego en la actualización vacía ():
    // Update is called once per frame
    void Update()
    {
        if (!photonView.isMine)
        {
            //Update remote player (smooth this, this looks good, at the cost of some accuracy)
            transform.position = Vector3.Lerp(transform.position, latestPos, Time.deltaTime * 5);
            transform.rotation = Quaternion.Lerp(transform.rotation, latestRot, Time.deltaTime * 5);
        }
    }
Aquí está el script final PlayerNetworkSync.cs:
using System.Collections;
using System.Collections.Generic;
using UnityEngine;

public class PlayerNetworkSync : Photon.MonoBehaviour
{
    //List of the scripts that should only be active for the local player (ex. PlayerController, MouseLook etc.)
    public MonoBehaviour[] localScripts;
    //List of the GameObjects that should only be active for the local player (ex. Camera, AudioListener etc.)
    public GameObject[] localObject;
    //Values that will be synced over network
    Vector3 latestPos;
    Quaternion latestRot;

    // Use this for initialization
    void Start()
    {
        if (photonView.isMine)
        {
            //Player is local
        }
        else
        {
            //Player is Remote
            for(int i = 0; i < localScripts.Length; i++)
            {
                localScripts[i].enabled = false;
            }
            for (int i = 0; i < localObject.Length; i++)
            {
                localObject[i].SetActive(false);
            }
        }
    }

    void OnPhotonSerializeView(PhotonStream stream, PhotonMessageInfo info)
    {
        if (stream.isWriting)
        {
            //We own this player: send the others our data
            stream.SendNext(transform.position);
            stream.SendNext(transform.rotation);
        }
        else
        {
            //Network player, receive data
            latestPos = (Vector3)stream.ReceiveNext();
            latestRot = (Quaternion)stream.ReceiveNext();
        }
    }

    // Update is called once per frame
    void Update()
    {
        if (!photonView.isMine)
        {
            //Update remote player (smooth this, this looks good, at the cost of some accuracy)
            transform.position = Vector3.Lerp(transform.position, latestPos, Time.deltaTime * 5);
            transform.rotation = Quaternion.Lerp(transform.rotation, latestRot, Time.deltaTime * 5);
        }
    }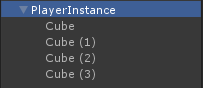
}- Agregue el script PlayerNetworkSync.cs a PlayerInstance y asígnelo a los componentes observados de PhotonView.
- Asigne PlayerCntroller.cs a "Local Scripts" y asigne GameObjects (que desea desactivar para jugadores remotos) a "Local Objects"

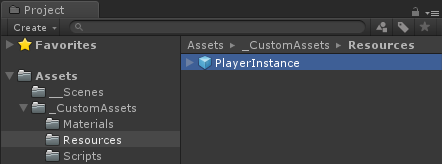
- Guarde PlayerInstance en Prefab y muévalo a la carpeta llamada Recursos (si no existe tal carpeta, cree una). Este paso es necesario para poder generar objetos multijugador en la red.
3. Crear un nivel de juego
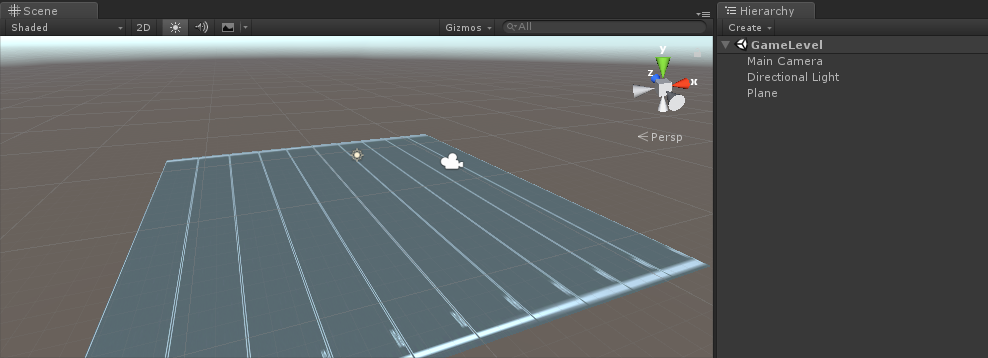
GameLevel es una escena que se carga después de unirse a la sala y es donde ocurre toda la acción.
- Crea una nueva escena y llámala "GameLevel" (o si quieres mantener un nombre diferente, asegúrate de cambiar el nombre en esta línea PhotonNetwork.LoadLevel("GameLevel"); en GameLobby.cs).
En mi caso, usaré una Escena simple con un Plano:
- Ahora crea un nuevo script y llámalo RoomController. Este script manejará la lógica dentro de la sala (como generar jugadores, mostrar la lista de jugadores, etc.).
Empecemos definiendo las variables necesarias:
    //Player instance prefab, must be located in the Resources folder
    public GameObject playerPrefab;
    //Player spawn point
    public Transform spawnPoint;
Para instanciar el reproductor prefabricado, usamos PhotonNetwork.Instantiate:
    // Use this for initialization
    void Start()
    {
        //In case we started this demo with the wrong scene being active, simply load the menu scene
        if (!PhotonNetwork.connected)
        {
            UnityEngine.SceneManagement.SceneManager.LoadScene("MainMenu");
            return;
        }

        //We're in a room. spawn a character for the local player. it gets synced by using PhotonNetwork.Instantiate
        PhotonNetwork.Instantiate(playerPrefab.name, spawnPoint.position, Quaternion.identity, 0);
    }
Y una interfaz de usuario simple con un botón "Leave Room" y algunos elementos adicionales, como el nombre de la sala y la lista de jugadores conectados:
    void OnGUI()
    {
        if (PhotonNetwork.room == null)
            return;

        //Leave this Room
        if (GUI.Button(new Rect(5, 5, 125, 25), "Leave Room"))
        {
            PhotonNetwork.LeaveRoom();
        }

        //Show the Room name
        GUI.Label(new Rect(135, 5, 200, 25), PhotonNetwork.room.Name);

        //Show the list of the players connected to this Room
        for (int i = 0; i < PhotonNetwork.playerList.Length; i++)
        {
            //Show if this player is a Master Client. There can only be one Master Client per Room so use this to define the authoritative logic etc.)
            string isMasterClient = (PhotonNetwork.playerList[i].IsMasterClient ? ": MasterClient" : "");
            GUI.Label(new Rect(5, 35 + 30 * i, 200, 25), PhotonNetwork.playerList[i].NickName + isMasterClient);
        }
    }
Y finalmente, implementamos otra devolución de llamada de PhotonNetwork llamada OnLeftRoom() que se llama cuando salimos de la habitación:
    void OnLeftRoom()
    {
        //We have left the Room, return to the MainMenu
        UnityEngine.SceneManagement.SceneManager.LoadScene("MainMenu");
    }
Y aquí está el script final RoomController.cs:
using UnityEngine;

public class RoomController : MonoBehaviour
{
    //Player instance prefab, must be located in the Resources folder
    public GameObject playerPrefab;
    //Player spawn point
    public Transform spawnPoint;

    // Use this for initialization
    void Start()
    {
        //In case we started this demo with the wrong scene being active, simply load the menu scene
        if (!PhotonNetwork.connected)
        {
            UnityEngine.SceneManagement.SceneManager.LoadScene("MainMenu");
            return;
        }

        //We're in a room. spawn a character for the local player. it gets synced by using PhotonNetwork.Instantiate
        PhotonNetwork.Instantiate(playerPrefab.name, spawnPoint.position, Quaternion.identity, 0);
    }

    void OnGUI()
    {
        if (PhotonNetwork.room == null)
            return;

        //Leave this Room
        if (GUI.Button(new Rect(5, 5, 125, 25), "Leave Room"))
        {
            PhotonNetwork.LeaveRoom();
        }

        //Show the Room name
        GUI.Label(new Rect(135, 5, 200, 25), PhotonNetwork.room.Name);

        //Show the list of the players connected to this Room
        for (int i = 0; i < PhotonNetwork.playerList.Length; i++)
        {
            //Show if this player is a Master Client. There can only be one Master Client per Room so use this to define the authoritative logic etc.)
            string isMasterClient = (PhotonNetwork.playerList[i].IsMasterClient ? ": MasterClient" : "");
            GUI.Label(new Rect(5, 35 + 30 * i, 200, 25), PhotonNetwork.playerList[i].NickName + isMasterClient);
        }
    }

    void OnLeftRoom()
    {
        //We have left the Room, return to the MainMenu
        UnityEngine.SceneManagement.SceneManager.LoadScene("MainMenu");
    }
}- Por último, cree un nuevo GameObject en la escena GameLevel y llámelo "_RoomController"
- Adjunte la secuencia de comandos RoomController al objeto _RoomController
- Asigne el prefabricado PlayerInstance y una transformación SpawnPoint y luego guarde la escena
- Agregue MainMenu y GameLevel a la configuración de compilación.

4. Hacer una compilación de prueba
Ahora es el momento de hacer una compilación y probarla:
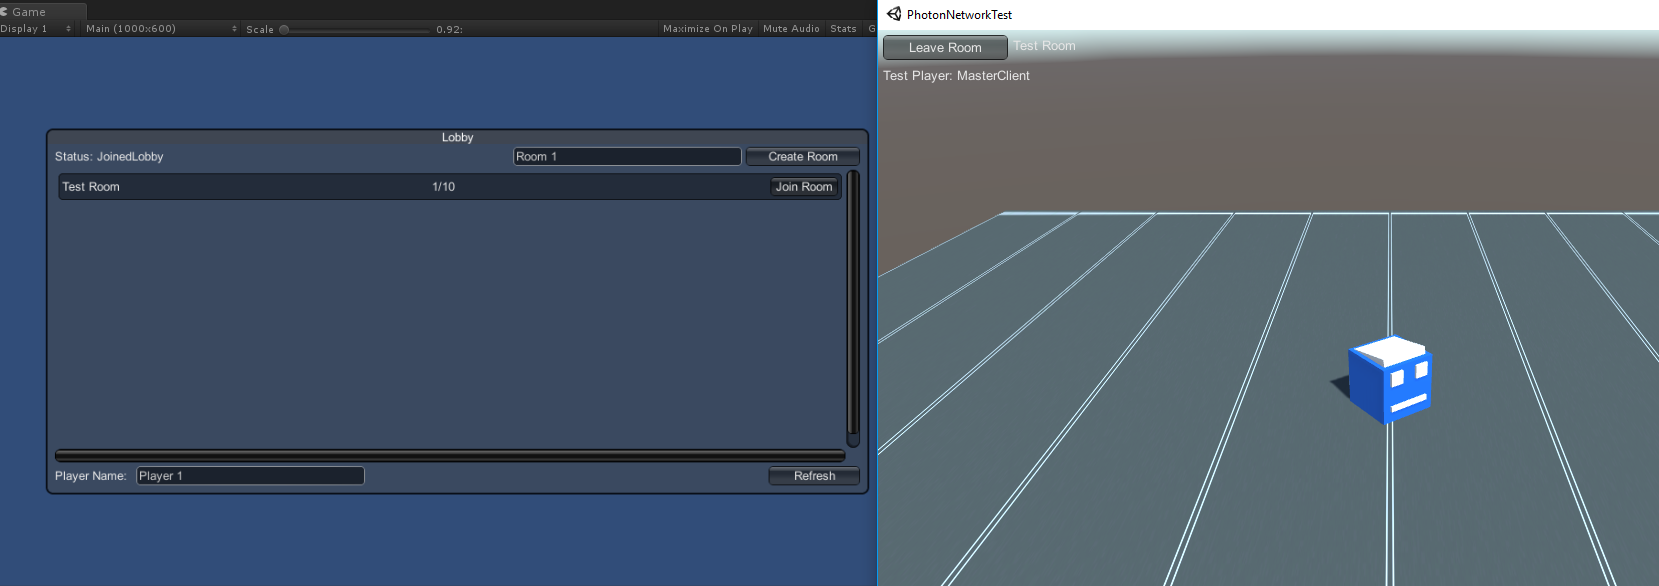

¡Todo funciona como se esperaba!
Prima
RPC
En Photon Network, RPC significa Llamada a procedimiento remoto, se usa para llamar a una función en clientes remotos que están en la misma sala (puede leer más sobre esto aquí).
Los RPC tienen muchos usos, por ejemplo, supongamos que necesita enviar un mensaje de chat a todos los jugadores en la sala. Con RPC, es fácil de hacer.
[PunRPC]
void ChatMessage(string senderName, string messageText)
{
    Debug.Log(string.Format("{0}: {1}", senderName, messageText));
}
Observe el [PunRPC] antes de la función. Este atributo es necesario si planea llamar a la función a través de RPC.
Para llamar a las funciones marcadas como RPC, necesita un PhotonView. Ejemplo de llamada:
PhotonView photonView = PhotonView.Get(this);
photonView.RPC("ChatMessage", PhotonTargets.All, PhotonNetwork.playerName, "Some message");
Consejo profesional: si su secuencia de comandos es Photon.MonoBehaviour o Photon.PunBehaviour, puede usar: this.photonView .RPC().
Propiedades personalizadas
En Photon Network, las propiedades personalizadas son una tabla hash que se puede asignar al reproductor o a la sala.
Esto es útil cuando necesita configurar datos persistentes que no necesitan cambiarse con frecuencia (por ejemplo, el nombre del equipo del jugador, el modo de juego de sala, etc.).
Primero, debe definir una tabla Hash, que se realiza agregando la siguiente línea al comienzo del script:
//Replace default Hashtables with Photon hashtables
using Hashtable = ExitGames.Client.Photon.Hashtable;
El siguiente ejemplo establece las propiedades de la habitación denominadas "GameMode" y "AnotherProperty":
        //Set Room properties (Only Master Client is allowed to set Room properties)
        if (PhotonNetwork.isMasterClient)
        {
            Hashtable setRoomProperties = new Hashtable();
            setRoomProperties.Add("GameMode", "FFA");
            setRoomProperties.Add("AnotherProperty", "Test");
            PhotonNetwork.room.SetCustomProperties(setRoomProperties);
        }

        //Will print "FFA"
        print((string)PhotonNetwork.room.CustomProperties["GameMode"]);
        //Will print "Test"
        print((string)PhotonNetwork.room.CustomProperties["AnotherProperty"]);
Las propiedades del reproductor se configuran de manera similar:
        //Set our Player's property
        Hashtable setPlayerProperties = new Hashtable();
        setPlayerProperties.Add("PlayerHP", (float)100);
        PhotonNetwork.player.SetCustomProperties(setPlayerProperties);

        //Will print "100"
        print((float)PhotonNetwork.player.CustomProperties["PlayerHP"]);
Para eliminar una propiedad específica, simplemente establezca su valor en nulo.
        //Remove property called "PlayerHP" from Player properties
        Hashtable setPlayerProperties = new Hashtable();
        setPlayerProperties.Add("PlayerHP", null);
        PhotonNetwork.player.SetCustomProperties(setPlayerProperties);