Tutorial multijugador en pantalla dividida y en la misma PC para Unity
En este tutorial, mostraré cómo crear un multijugador en pantalla dividida en Unity.
Pasos
- Abre una Escena con tu nivel (en mi caso será una Escena simple con algunos Cubos)

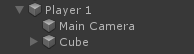
- Crea un nuevo GameObject y llámalo "Player 1"
- Cree un nuevo cubo y muévalo dentro del objeto "Player 1" (elimine su componente Box Collider)
- Cree algunos cubos más para los ojos y la boca (elimine también sus componentes de Box Collider)
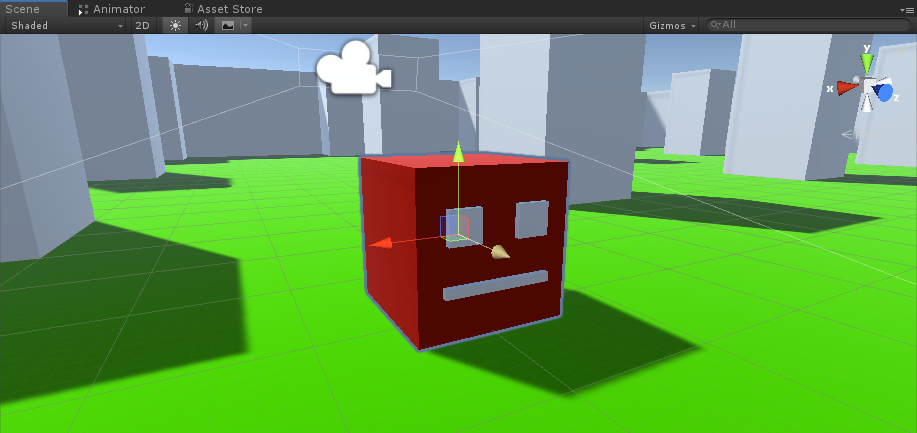
- Mueve la cámara principal dentro del objeto "Player 1" y apúntala a un cubo

- Cree un nuevo script, asígnele el nombre "RigidbodyPlayerController" y pegue el siguiente código dentro de él:
RigidbodyPlayerController.cs
using UnityEngine;
using System.Collections;

[RequireComponent(typeof(Rigidbody))]
[RequireComponent(typeof(CapsuleCollider))]

public class RigidbodyPlayerController : MonoBehaviour
{

    public enum PlayerControls { WASD, Arrows }
    public PlayerControls playerControls = PlayerControls.WASD;
    public float movementSpeed = 3f;
    public float rotationSpeed = 5f;

    Rigidbody r;
    float gravity = 10.0f;

    void Awake()
    {
        r = GetComponent<Rigidbody>();
        r.freezeRotation = true;
        r.useGravity = false;
    }

    // Update is called once per frame
    void FixedUpdate()
    {
        // Move Front/Back
        Vector3 targetVelocity = Vector3.zero;
        if ((playerControls == PlayerControls.WASD && Input.GetKey(KeyCode.W)) || (playerControls == PlayerControls.Arrows && Input.GetKey(KeyCode.UpArrow)))
        {
            targetVelocity.z = 1;
        }
        else if ((playerControls == PlayerControls.WASD && Input.GetKey(KeyCode.S)) || (playerControls == PlayerControls.Arrows && Input.GetKey(KeyCode.DownArrow)))
        {
            targetVelocity.z = -1;
        }
        targetVelocity = transform.TransformDirection(targetVelocity);
        targetVelocity *= movementSpeed;

        // Apply a force that attempts to reach our target velocity
        Vector3 velocity = r.velocity;
        Vector3 velocityChange = (targetVelocity - velocity);
        float maxVelocityChange = 10.0f;
        velocityChange.x = Mathf.Clamp(velocityChange.x, -maxVelocityChange, maxVelocityChange);
        velocityChange.z = Mathf.Clamp(velocityChange.z, -maxVelocityChange, maxVelocityChange);
        velocityChange.y = 0;
        r.AddForce(velocityChange, ForceMode.VelocityChange);

        // We apply gravity manually for more tuning control
        r.AddForce(new Vector3(0, -gravity * r.mass, 0));


        // Rotate Left/Right
        if ((playerControls == PlayerControls.WASD && Input.GetKey(KeyCode.A)) || (playerControls == PlayerControls.Arrows && Input.GetKey(KeyCode.LeftArrow)))
        {
            transform.Rotate(new Vector3(0, -14, 0) * Time.deltaTime * rotationSpeed, Space.Self);
        }
        else if ((playerControls == PlayerControls.WASD && Input.GetKey(KeyCode.D)) || (playerControls == PlayerControls.Arrows && Input.GetKey(KeyCode.RightArrow)))
        {
            transform.Rotate(new Vector3(0, 14, 0) * Time.deltaTime * rotationSpeed, Space.Self);
        }
    }
}- Adjunte el script RigidbodyPlayerController a "Player 1" (notará que agregará 2 componentes más, Rigidbody y Capsule Collider)
- Modifique Capsule Collider hasta que coincida con las dimensiones del cubo.
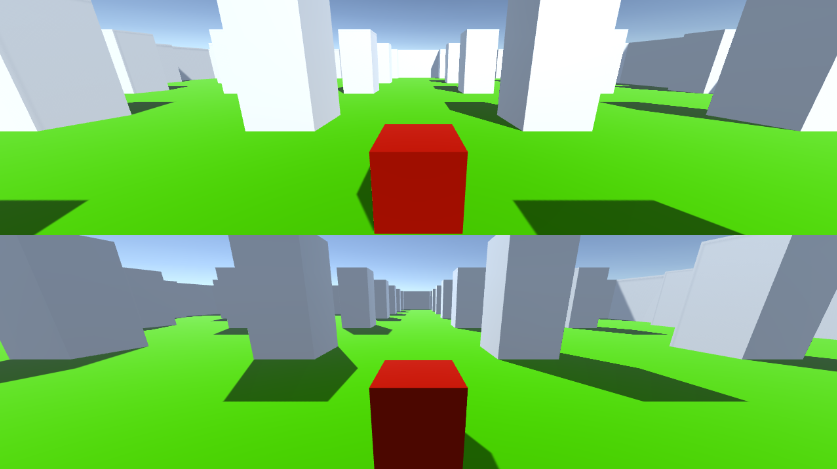
A continuación se detallan los pasos para crear una pantalla dividida para 2 jugadores:
- Duplica el objeto "Player 1" y cámbiale el nombre a "Player 2".
- En RigidbodyPlayerController cambie los controles del reproductor a "Arrows".

- Cambie los valores de Viewport Rect de la cámara "Player 1" a X: 0 Y: 0,5 W: 1 H: 0,5
![]()
- Cambie los valores de Viewport Rect de "Player 2" Cámara a X: 0 Y: 0 W: 1 H: 0,5
![]()
Alternativamente, puede configurar una pantalla dividida vertical estableciendo los siguientes valores:
X: 0 Y: 0 W: 0,5 H: 1 para la cámara 1
X: 0,5 Y: 0 W: 0,5 H: 1 para la cámara 2
